Basic Tempomapping
The most important step before placing down any notes is ensuring your tempo markers are set correctly. There are multiple methods to achieve this.
Finding the BPM and offset
When dealing with any decently popular track, the BPM can be easily found with a Google search, with results coming up from websites like TuneBat. Alternatively:
- Use Arrow Vortex, a tool for creating charts for games like DDR, ITG, StepMania and more. It comes with a BPM and offset detection tool that is reliable enough in most cases.
- Cross-reference the tempomap from a completed chart of your song in a different game like osu! or Quaver.
- Use the in-game BPM tapper tool and set the offset manually.
Using Arrow Vortex
Start by downloading and unzipping the program’s files anywhere. You may need 7-Zip to complete this step.
Next, launch ArrowVortex.exe. You’ll be presented with the following view:
![]()
Next:
-
Drag-and-drop, or
File -> Open...your exported audio file. -
In
View, enableTime based (C-mod). This will allow you to see the waveform of the track. You can zoom further in and out withCtrl + Mouse wheel. -
In
Tempo, click onAdjust sync.... You’ll be presented with the following menu: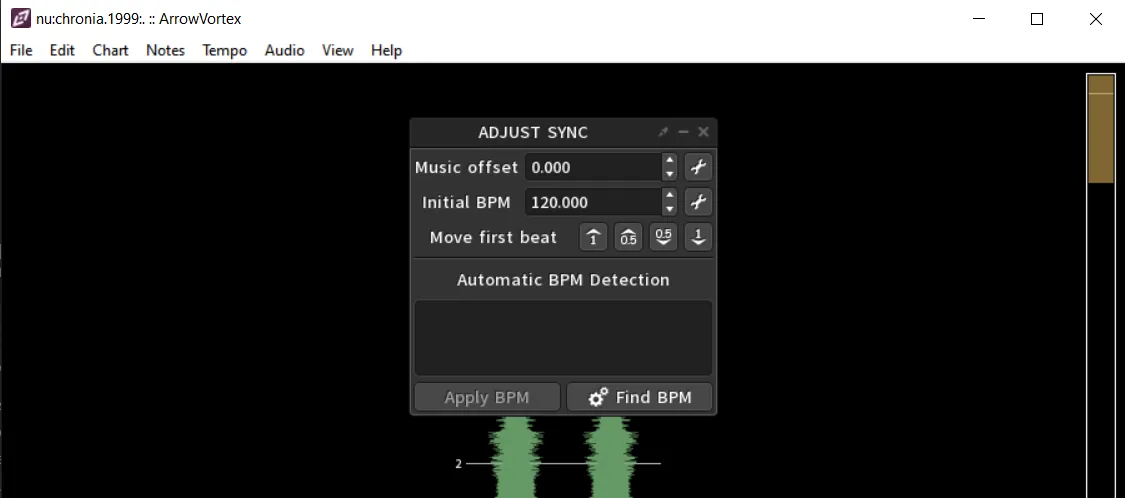
-
Click on
Find BPM. Shortly after, AV will return one or more results: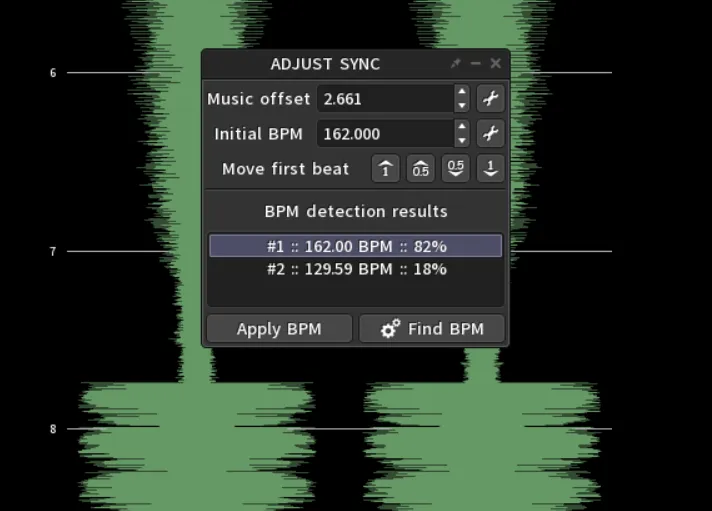
Arrow Vortex can return multiple results whenever you’re working with tracks that may have an “unquantized” section (most likely the intro like in this example).
Furthermore, its’ most confident result could have an unrounded BPM value or a slightly incorrect offset. It is usually safe to round up the BPM value unless it is that exact.
As for the offset, AV might’ve placed the beat one or two ticks forward/back. Use the buttons next toMove first beatto adjust it. Then, you can zoom in even further to make tiny adjustments (in the order of milliseconds) to accurately match the beat ticks to the waveform. -
Enable the metronome by pressing
F3, listen through the track and make any necessary adjustments to accurately match the waveform with the beat ticks.
| Original result | Adjusted |
|---|---|
In the example above, the offset was adjusted by one beat up, then incremented by +0.007, yielding the new offset result of 0.078.
This value, alongside the BPM, will be the value you assign to the first BPM marker in your chart in the SRXD editor. Take note of it somewhere.
Using charts from other games
If the song you’re charting is available on other community-driven rhythm games, you can reference their tempomap in your own SRXD chart. Let’s use a Quaver chart as an example. We can read its’ contents with any simple text editor, like Notepad++.
AudioFile: audio.mp3SongPreviewTime: 68249BackgroundFile: ...MapId: ...MapSetId: ...Mode: Keys4Title: ...Artist: ...Source: ''Tags: ...Creator: ...DifficultyName: ...Description: ...EditorLayers: []TimingPoints:- StartTime: 9321 Bpm: 125.999992The TimingPoints field contains all the tempo markers in the chart, and the first one in the list indicates the StartTime,
which in our case would be the offset (in milliseconds), and the BPM.
Using the in-game BPM tap tool
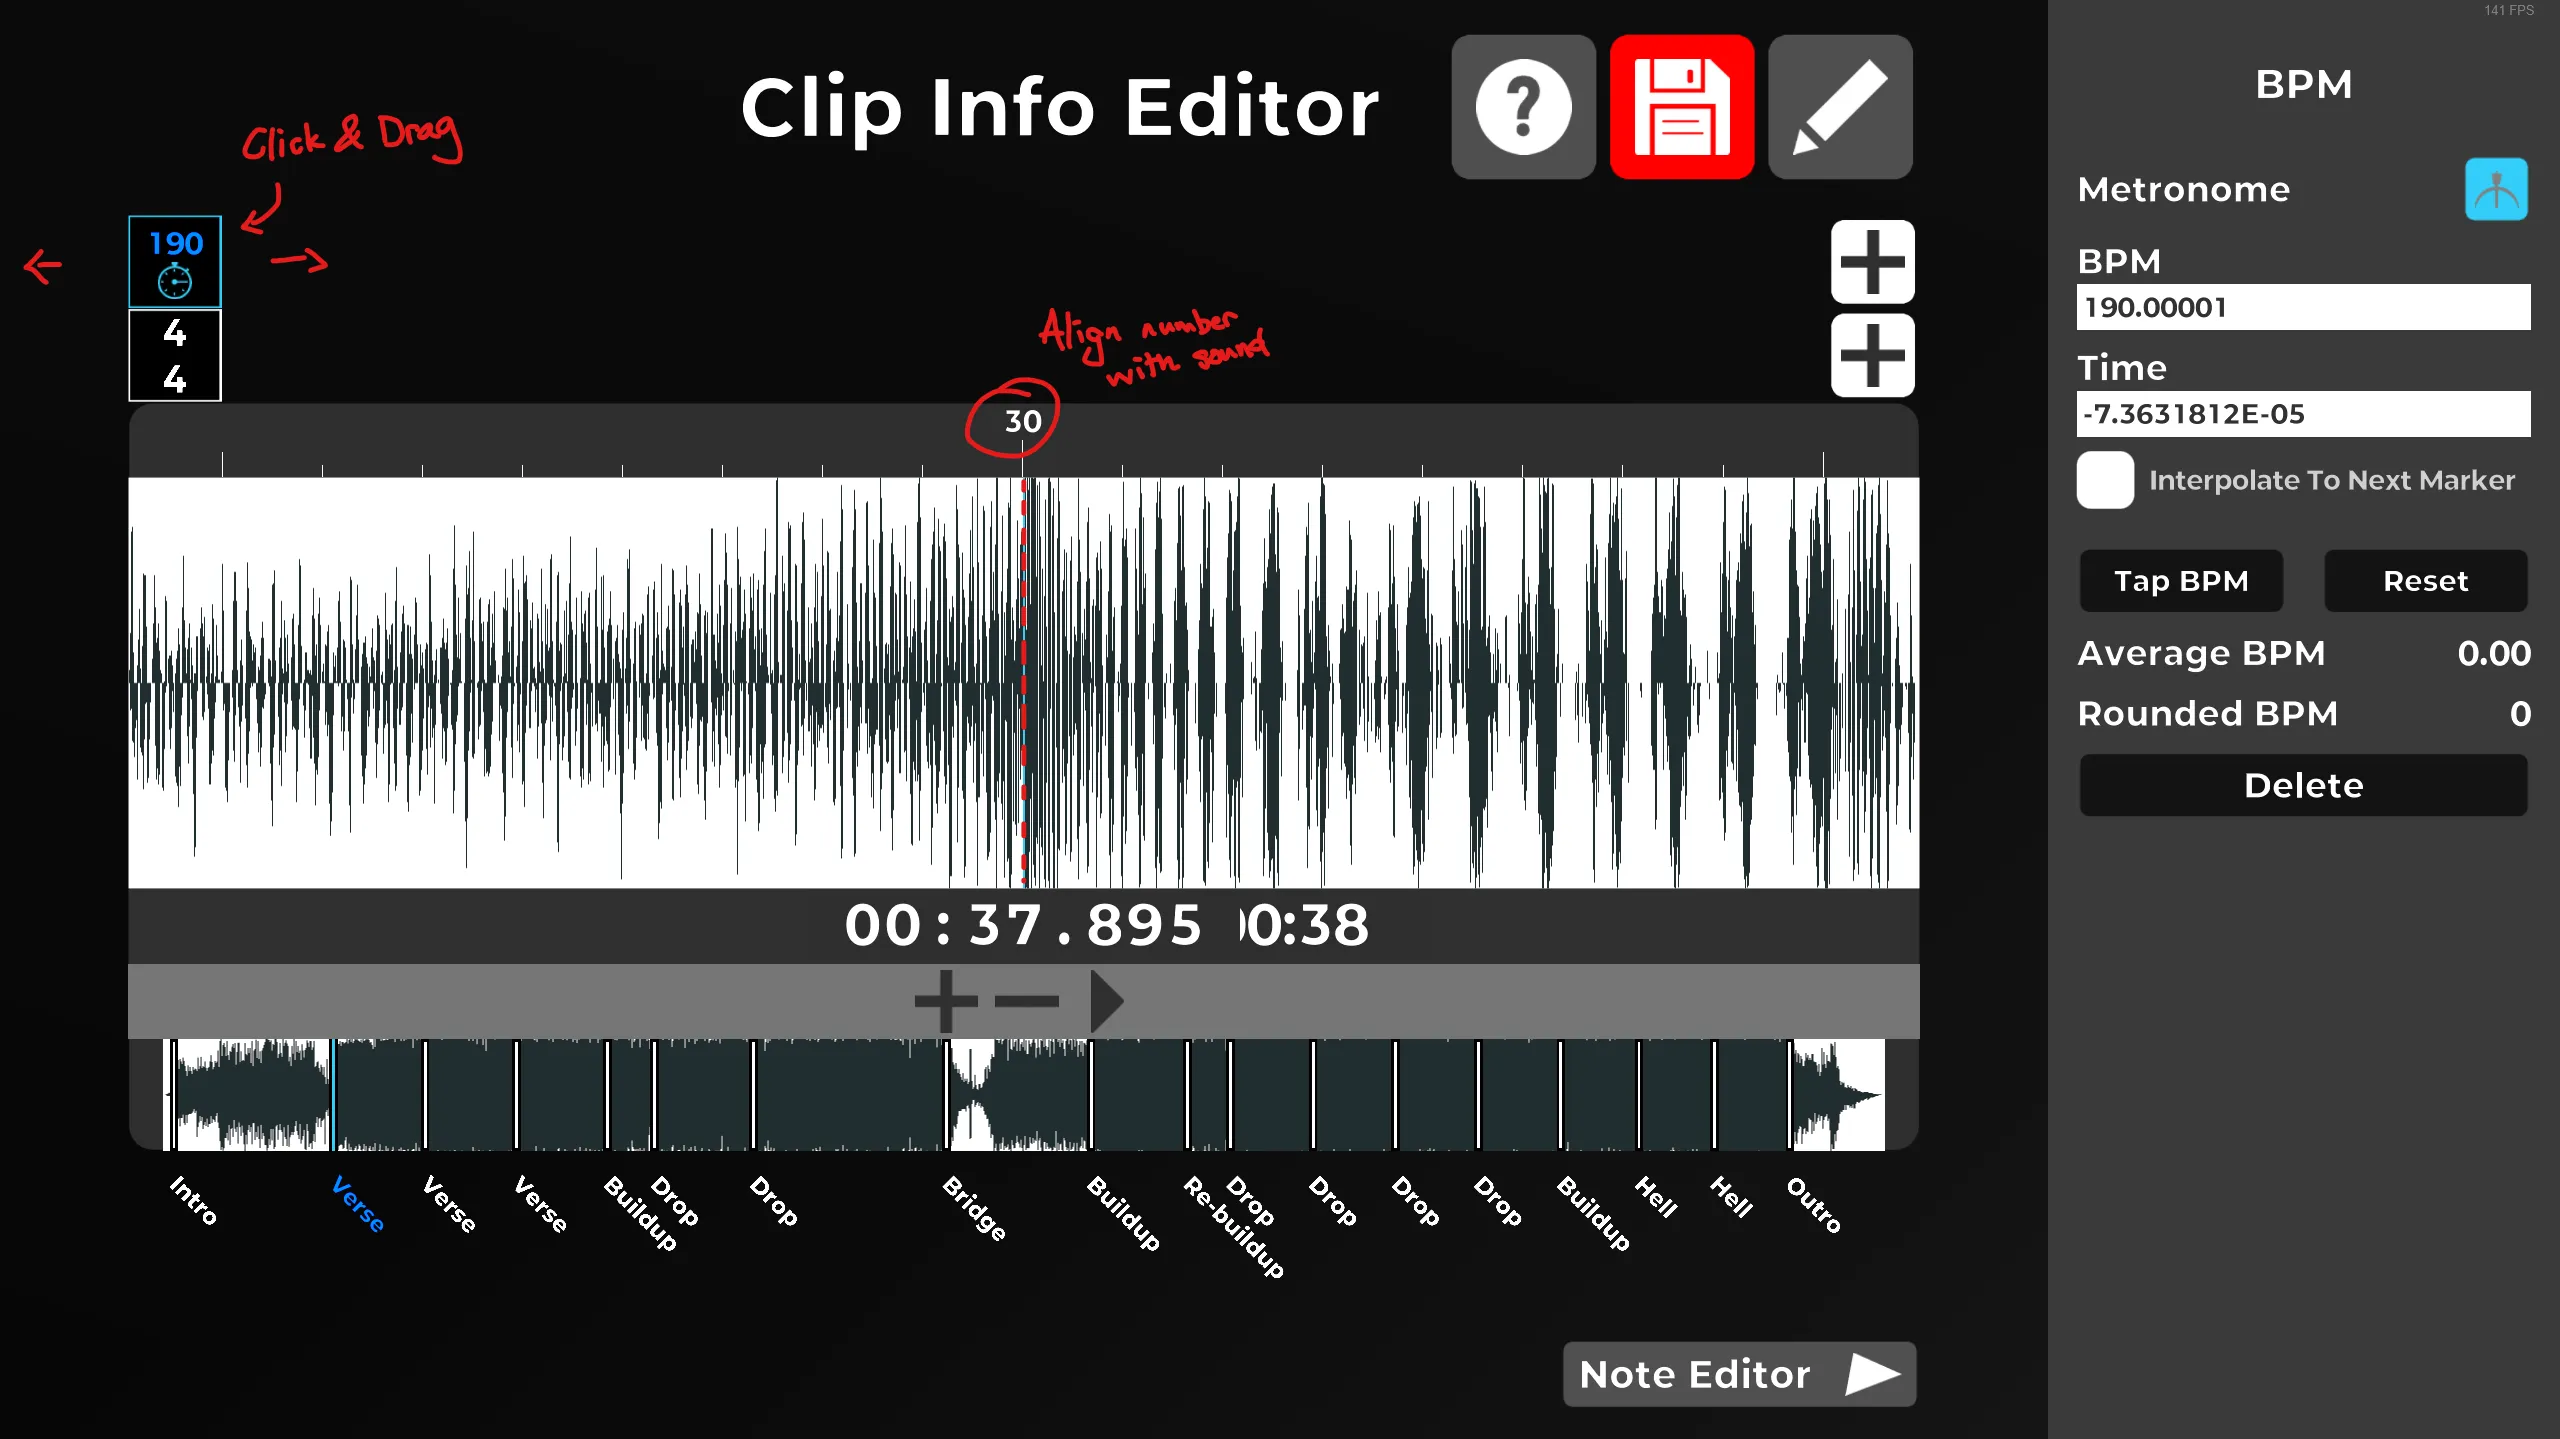
Lastly, you have the option to tap out the BPM manually using the in-game tool in the Clip Info editor.
To access it, cycle through the editor modes using the ` key (backtick, by default) and click on any tempo marker.
To double check the accuracy of your values, you can let the song play and enable the metronome with the dedicated button above,
or with the Shift + C global hotkey combo.
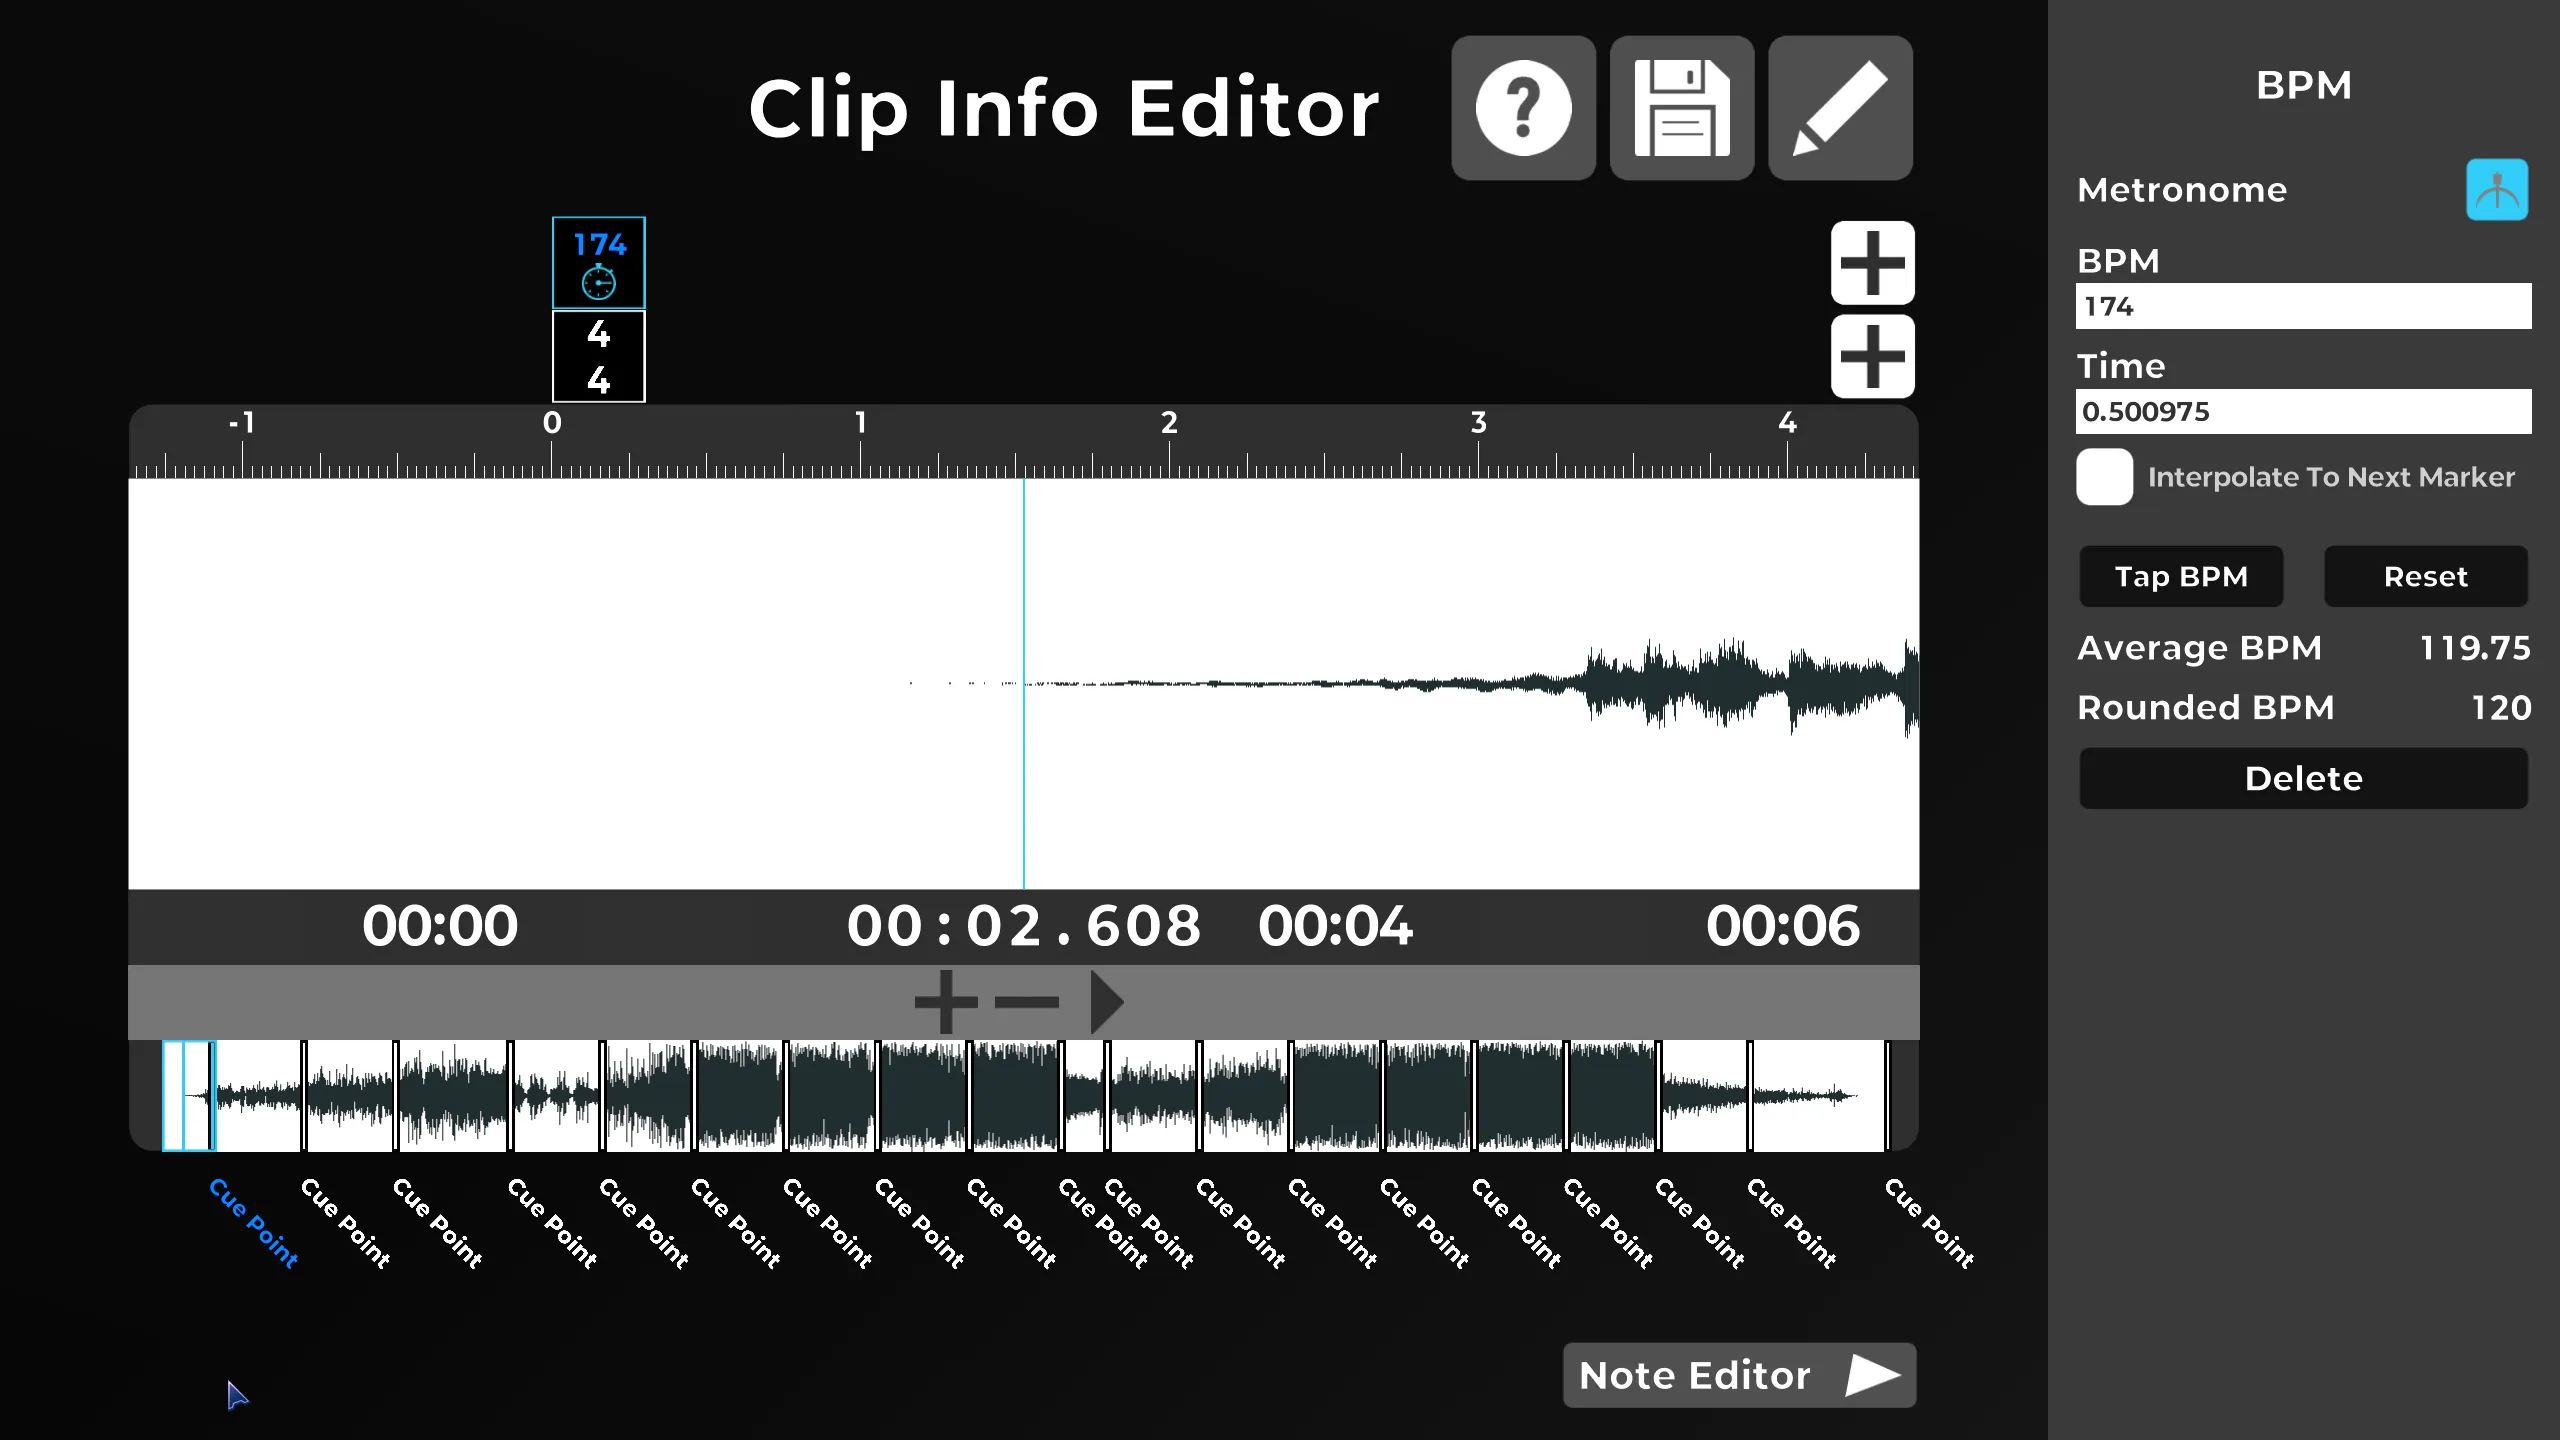
Adjusting the first tempo marker
Now that we’ve determined the correct BPM and offset values for your track, it’s time to use them in our SRXD chart.
First, find a sound in the music with a short attack, such as a kick drum, that lands on the start of a measure. A sharper sound leads to a sharper waveform,
which will allow you to more accurately determine the offset of the tempomap.
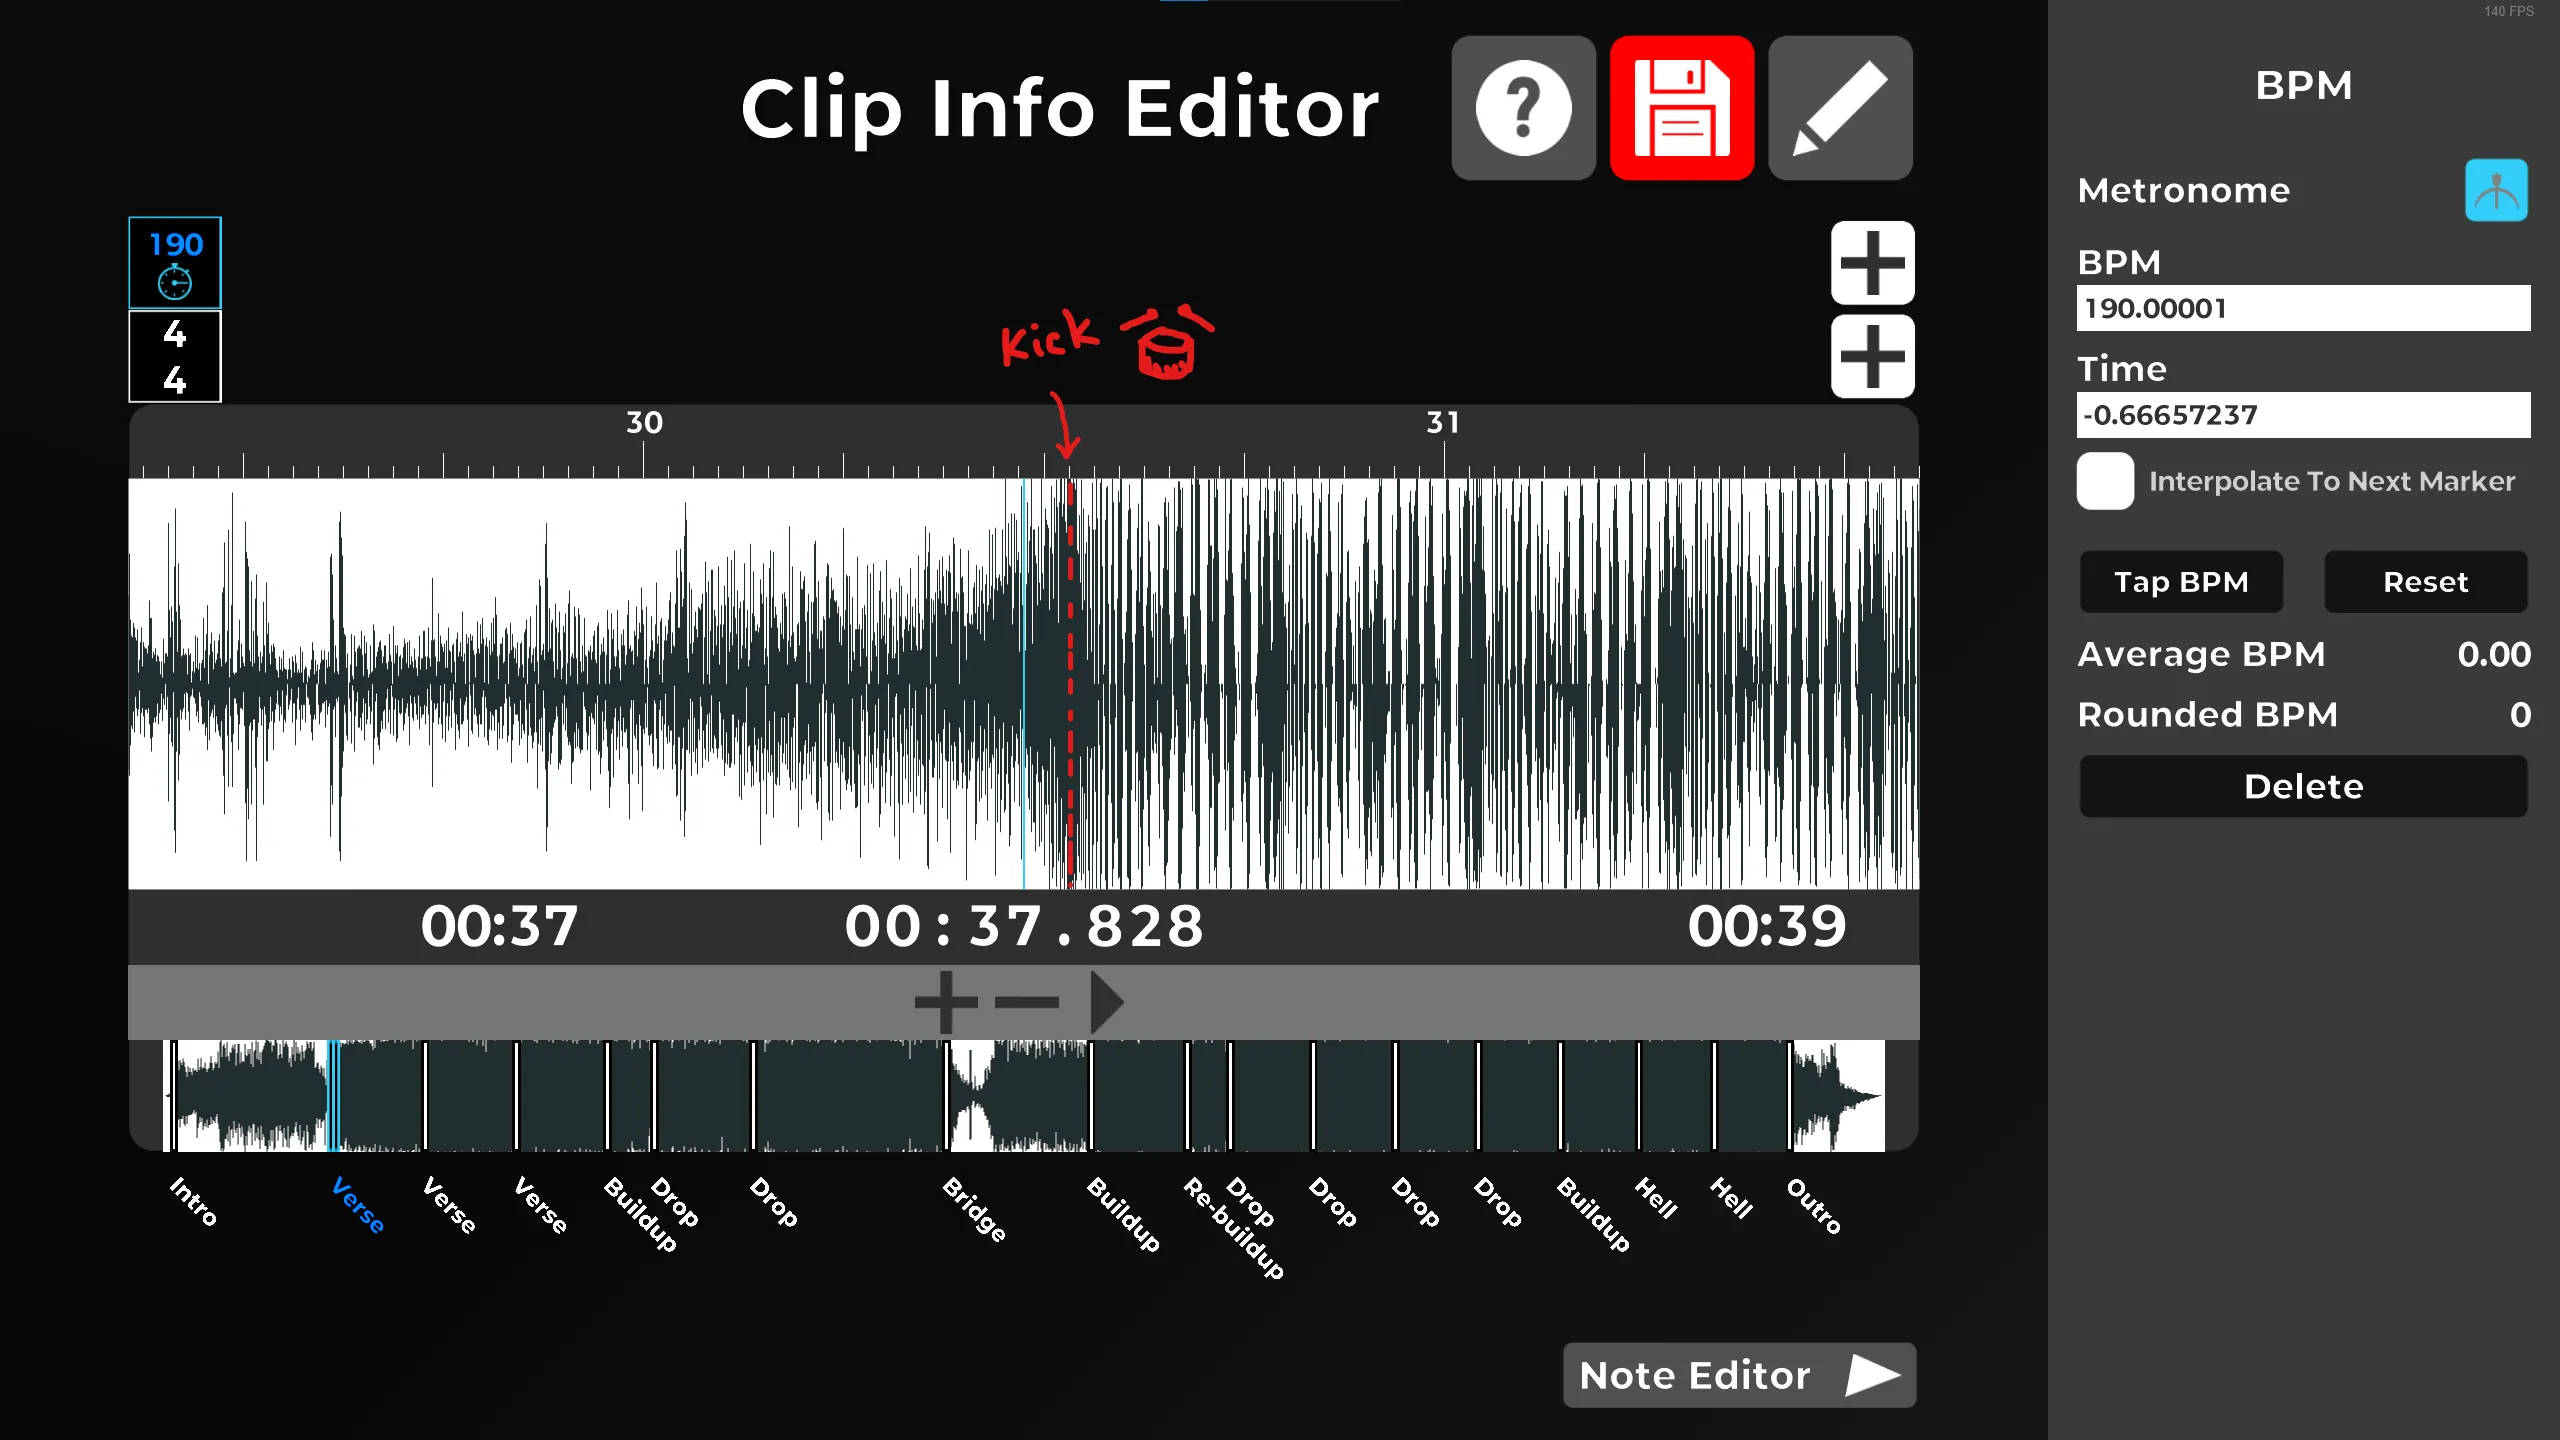
Then you can click and drag the tempo marker to adjust the measure numbers such that they line up with the sound you have chosen.